Lolita Challenge: Turn a Boring Everyday Item into Something Lovely
Nothing is more fun than a creative project, right? I have a rather impressive stack of creative art and craft supplies, and I love to create new things. This week, I thought that I would tackle a long overdue project. My current Sailor Moon case is lovely; but I have seen it every day and it is time for a change. After I selected the charms I wished to use on my new decoden case, it was time to turn a phone case cute!
Armed with my charms, rhinestones, the super secure E6000 glue with the precision tip, filter mask and placement pencil, it was time to begin!
While this would be an extremely simple task with a solid cellphone case, at only $1 at my local DollarTree, I could not resist! I purchased this item with the full intention that I would smother it in decoden cuteness. With a simple card stock base with a waterproof seal that I secure to the phone case, I would be able to glue the decoden pieces to the case with the appearance of a white base. This can be a temporary fix.
Step One: Prep
Secure the Card Stock
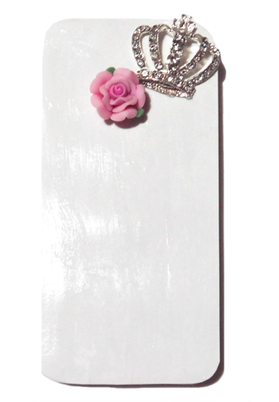
Since the case is not a solid color, the card stock would create a flat and solid background. I took some of the white card stock I had on hand and outlined the size of my phone. After I cut out the desired shape, I used the 3600 glue to secure the base to the phone case. It would take a good 24 hours to be completely dry, but I would be able to glue my charms to the base in the meantime.
Top it off with Glaze
Once this was accomplished, I took some clear waterproof glaze on the card stock (see right). Thankfully the clear coat of glaze dried quickly!
Step Two: Design
Before you Glue, Design
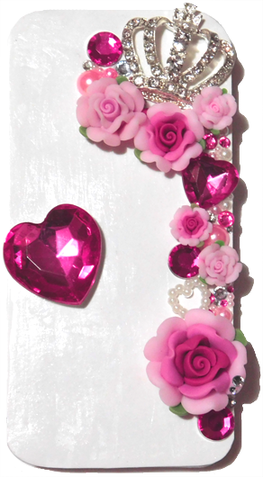
While the card stock dried, I took the time to plan the design that I wished to create. I like to do this a bit before I start my project, to prevent mistakes. This also allowed me to add or remove specific charms from my current selection. A few added resin glitter hearts, open pearl hearts, and extra rhinestones made the perfect addition to my current charm options.
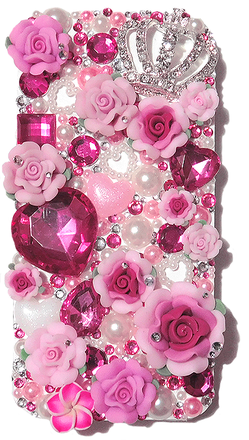
I really liked the charms that I chose for my new phone case! The case features various pink and white shades, and all the items I selected are extremely feminine. This will be my go-to case for lolita fashion meetups for sure!
Step Three: Get The Glue
Time to Get Permanent
Once the base was finally dry, it was time to decorate! E6000 is my favorite glue and I would recommend it highly. Not only is the glue easy to use, especially with a precision tip, but it dries within a day and it is secure. The only downside is that you must wear a rather unflattering mask with the correct chemical preventative filters.
I used the precision tip to place the desired amount of glue to the phone base. I then used the wax placement pencil to secure each charm to the cellphone case base. Overall, the arrangement of the charms took me around 2 hours from start to finish. I am a bit of a perfectionist, so I tend to take my time with any type of projects.
Step Four: Enjoy!
Just Sit Back, and Admire Your Handiwork
Tada! My decoden piece is now complete! I am extremely happy with the result. For my first large scale decoden piece, I am surprised that this project turned out as well as it did. I am glad that I was able to make something that I can use that is functional and pretty! I may transfer this project over to a full solid color case, but for now, I believe that the card stock will hold up just fine in the meantime.
Do you like decoden? What pieces have you created yourself, or what are some of your favorite decoden pieces? I would love to see your work or purchases!


